Allow External Users to Access DayBack Without a Salesforce Login
Background
When using DayBack's Salesforce Connect option to allow customers to book events on a public calendar, you likely don't want these customers to have to log into Salesforce—especially since they might not even be Salesforce users. Similarly, if you're using Salesforce Connect to let contractors keep track of their schedules, you won't want to create individual Salesforce user accounts for all of them.
Fortunately, DayBack allows you to designate a single Salesforce account that multiple DayBack users can share for making requests from outside Salesforce. For example, you might set up a "Public Calendar" user in Salesforce dedicated to visitors booking appointments. This means that any visitor accessing your calendar will, under the hood, interact with Salesforce as this "Public Calendar" user.
The instructions below will show you how to create a shared login.
Enabling External Requests into Salesforce
You'll need to be able to see your Salesforce org from outside of Salesforce in order to complete these steps. This likely requires you to make a simple change in your org as described here: Granting Access to DayBack.
Setting Up a Shared Login
- 1
-
Create the User in Salesforce:
- First, create the user in Salesforce. We recommend that this user have a new profile that has read-only access to most objects, and perhaps read-write access to the appointments object or, better yet, to a "pending appointments" object just used for receiving new appointments from your public calendar. Here's how Salesforce describes creating this user: Create a secure Salesforce API user
- 2
-
Log into Dayback Outside of Salesforce:
- Next, log into DayBack outside of Salesforce at https://app.dayback.com and navigate to administrator settings. Find your Salesforce Connect source in the left-hand sidebar:

- Next, log into DayBack outside of Salesforce at https://app.dayback.com and navigate to administrator settings. Find your Salesforce Connect source in the left-hand sidebar:
- 3
-
Configure Shared Login:
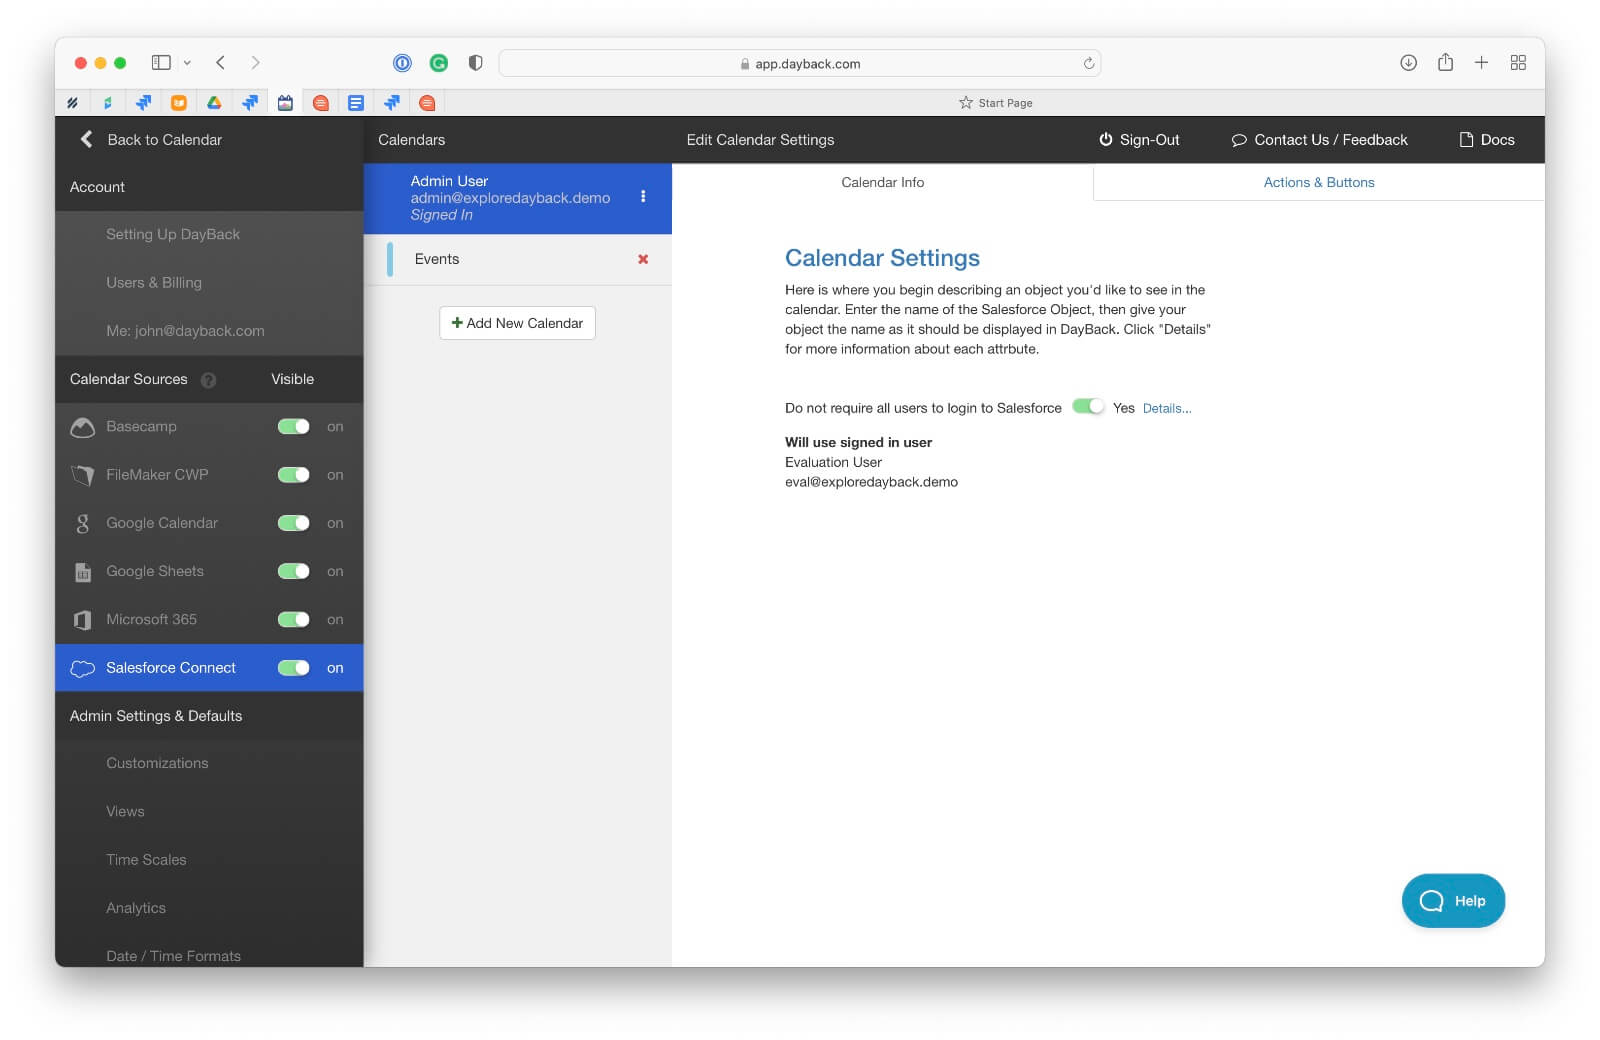
- Click on your account at the top of the second column, right below where it says "Calendar"
- Turn "Do Not Require All Users to Log Into Salesforce" to "Yes":

- 4
-
Log in as the Public Calendar User:
- When prompted to log into Salesforce, do NOT log in as the admin of your org. Instead, log in as the "Public Calendar" user created in Step 1. This account will be used by some or all of your DayBack users to request your schedule from Salesforce.
- After signing in as the "Public Calendar" user, you will see that user's account information displayed. In this example, you see "Evaluation User" is the username we've created for our mostly-read-only "Public Calendar" user.

- 5
-
Configure User Access:
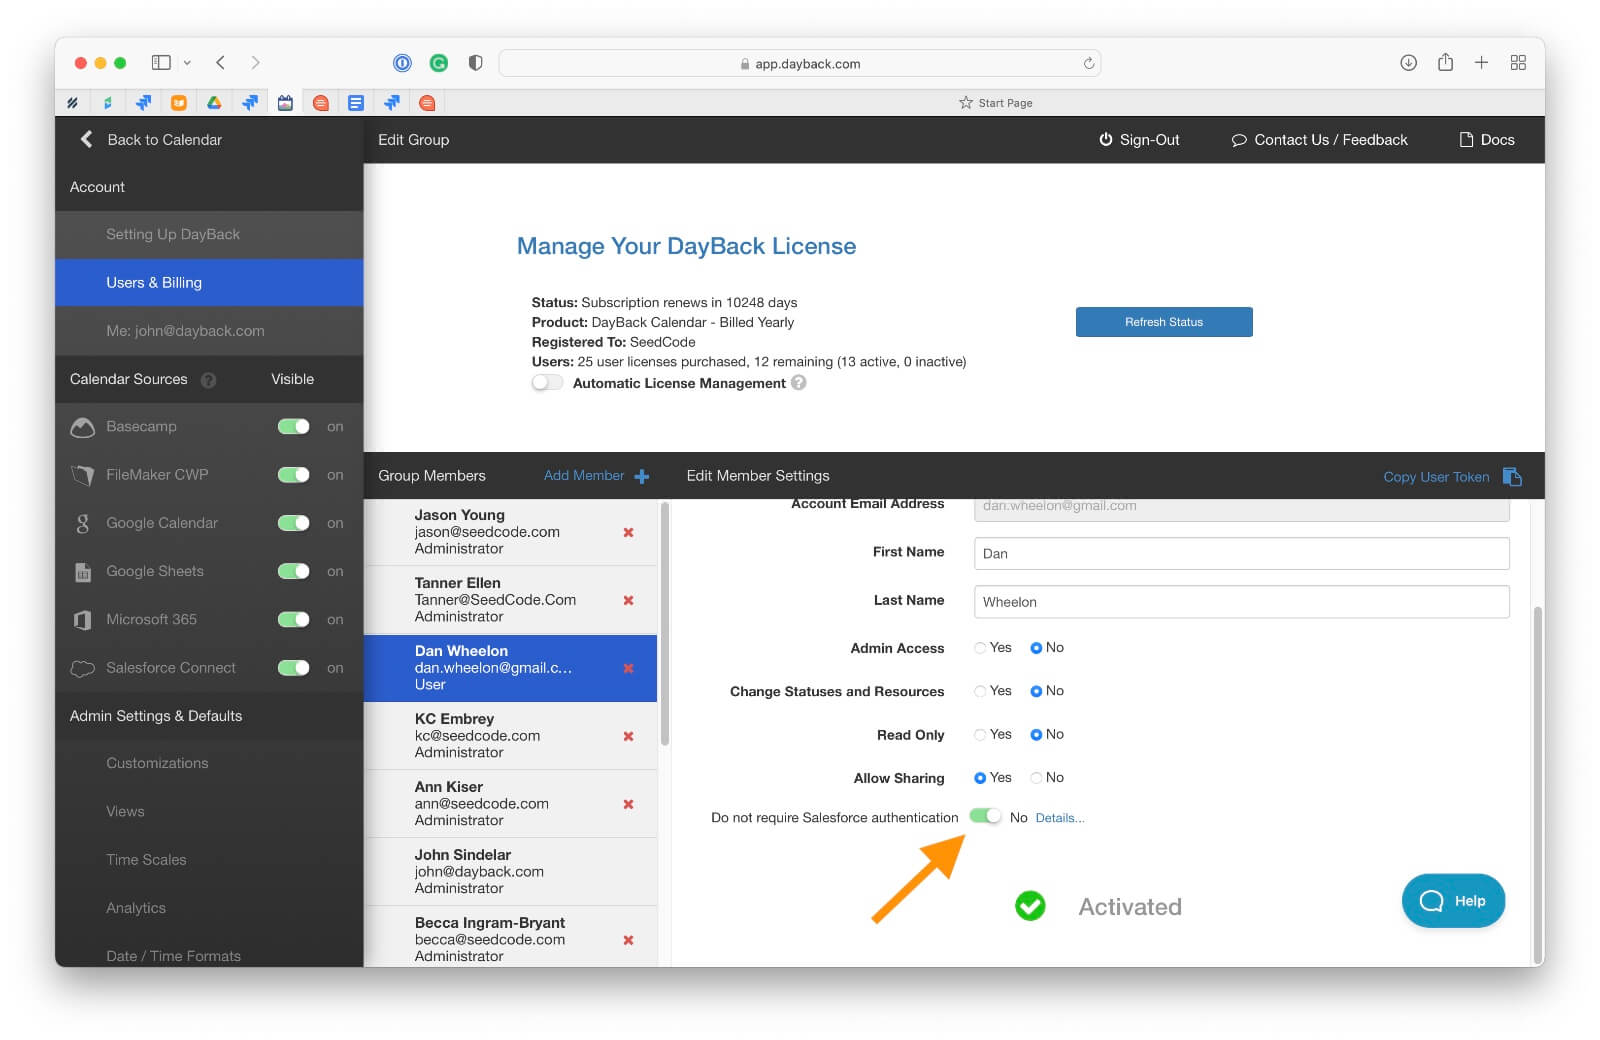
- Go to "Users and Billing" in the left-hand sidebar.
- Click on any user who shouldn't be prompted to log into Salesforce.
- For each user, switch "Do not require Salesforce authentication" to "Yes." These users will now be logged in automatically as the "Public Calendar" user specified in Step 3 ("Evaluation User" in this example).
 That's it.