
Formatting the Display of Events
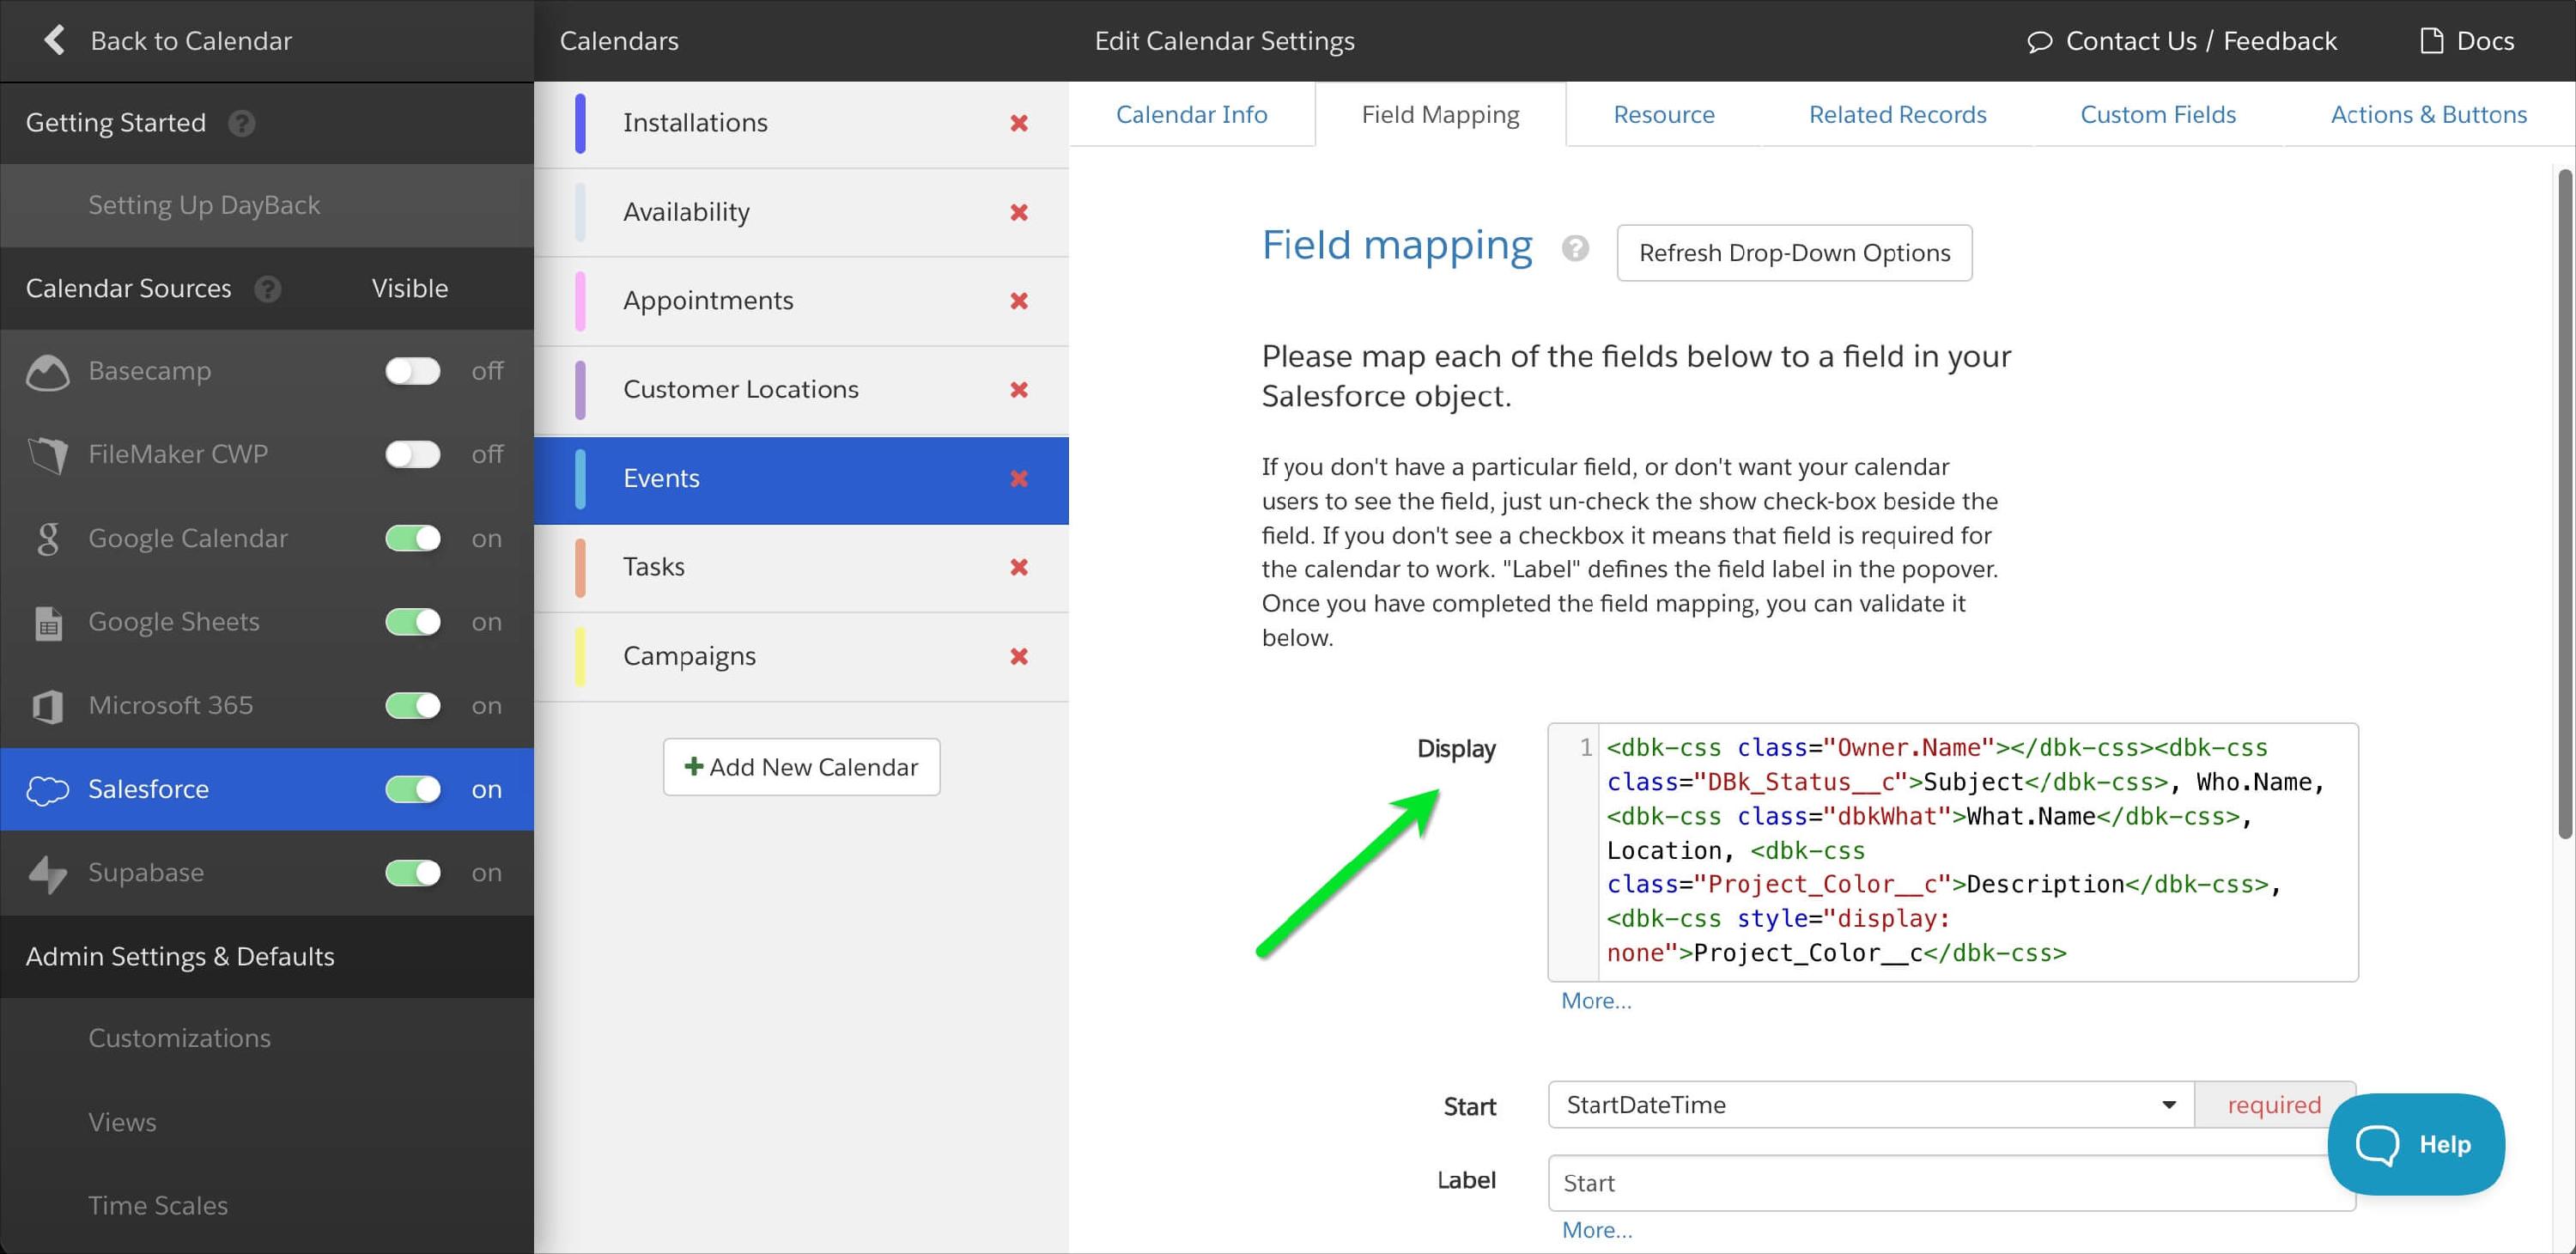
The "Display" field in DayBack gives you a lot of control over how events appear on your calendar. The field can be configured as a simple list of comma separated field names, or it can contain tags and CSS to render icons and change how events display on different views. You'll learn about all these options in the notes and articles linked below.
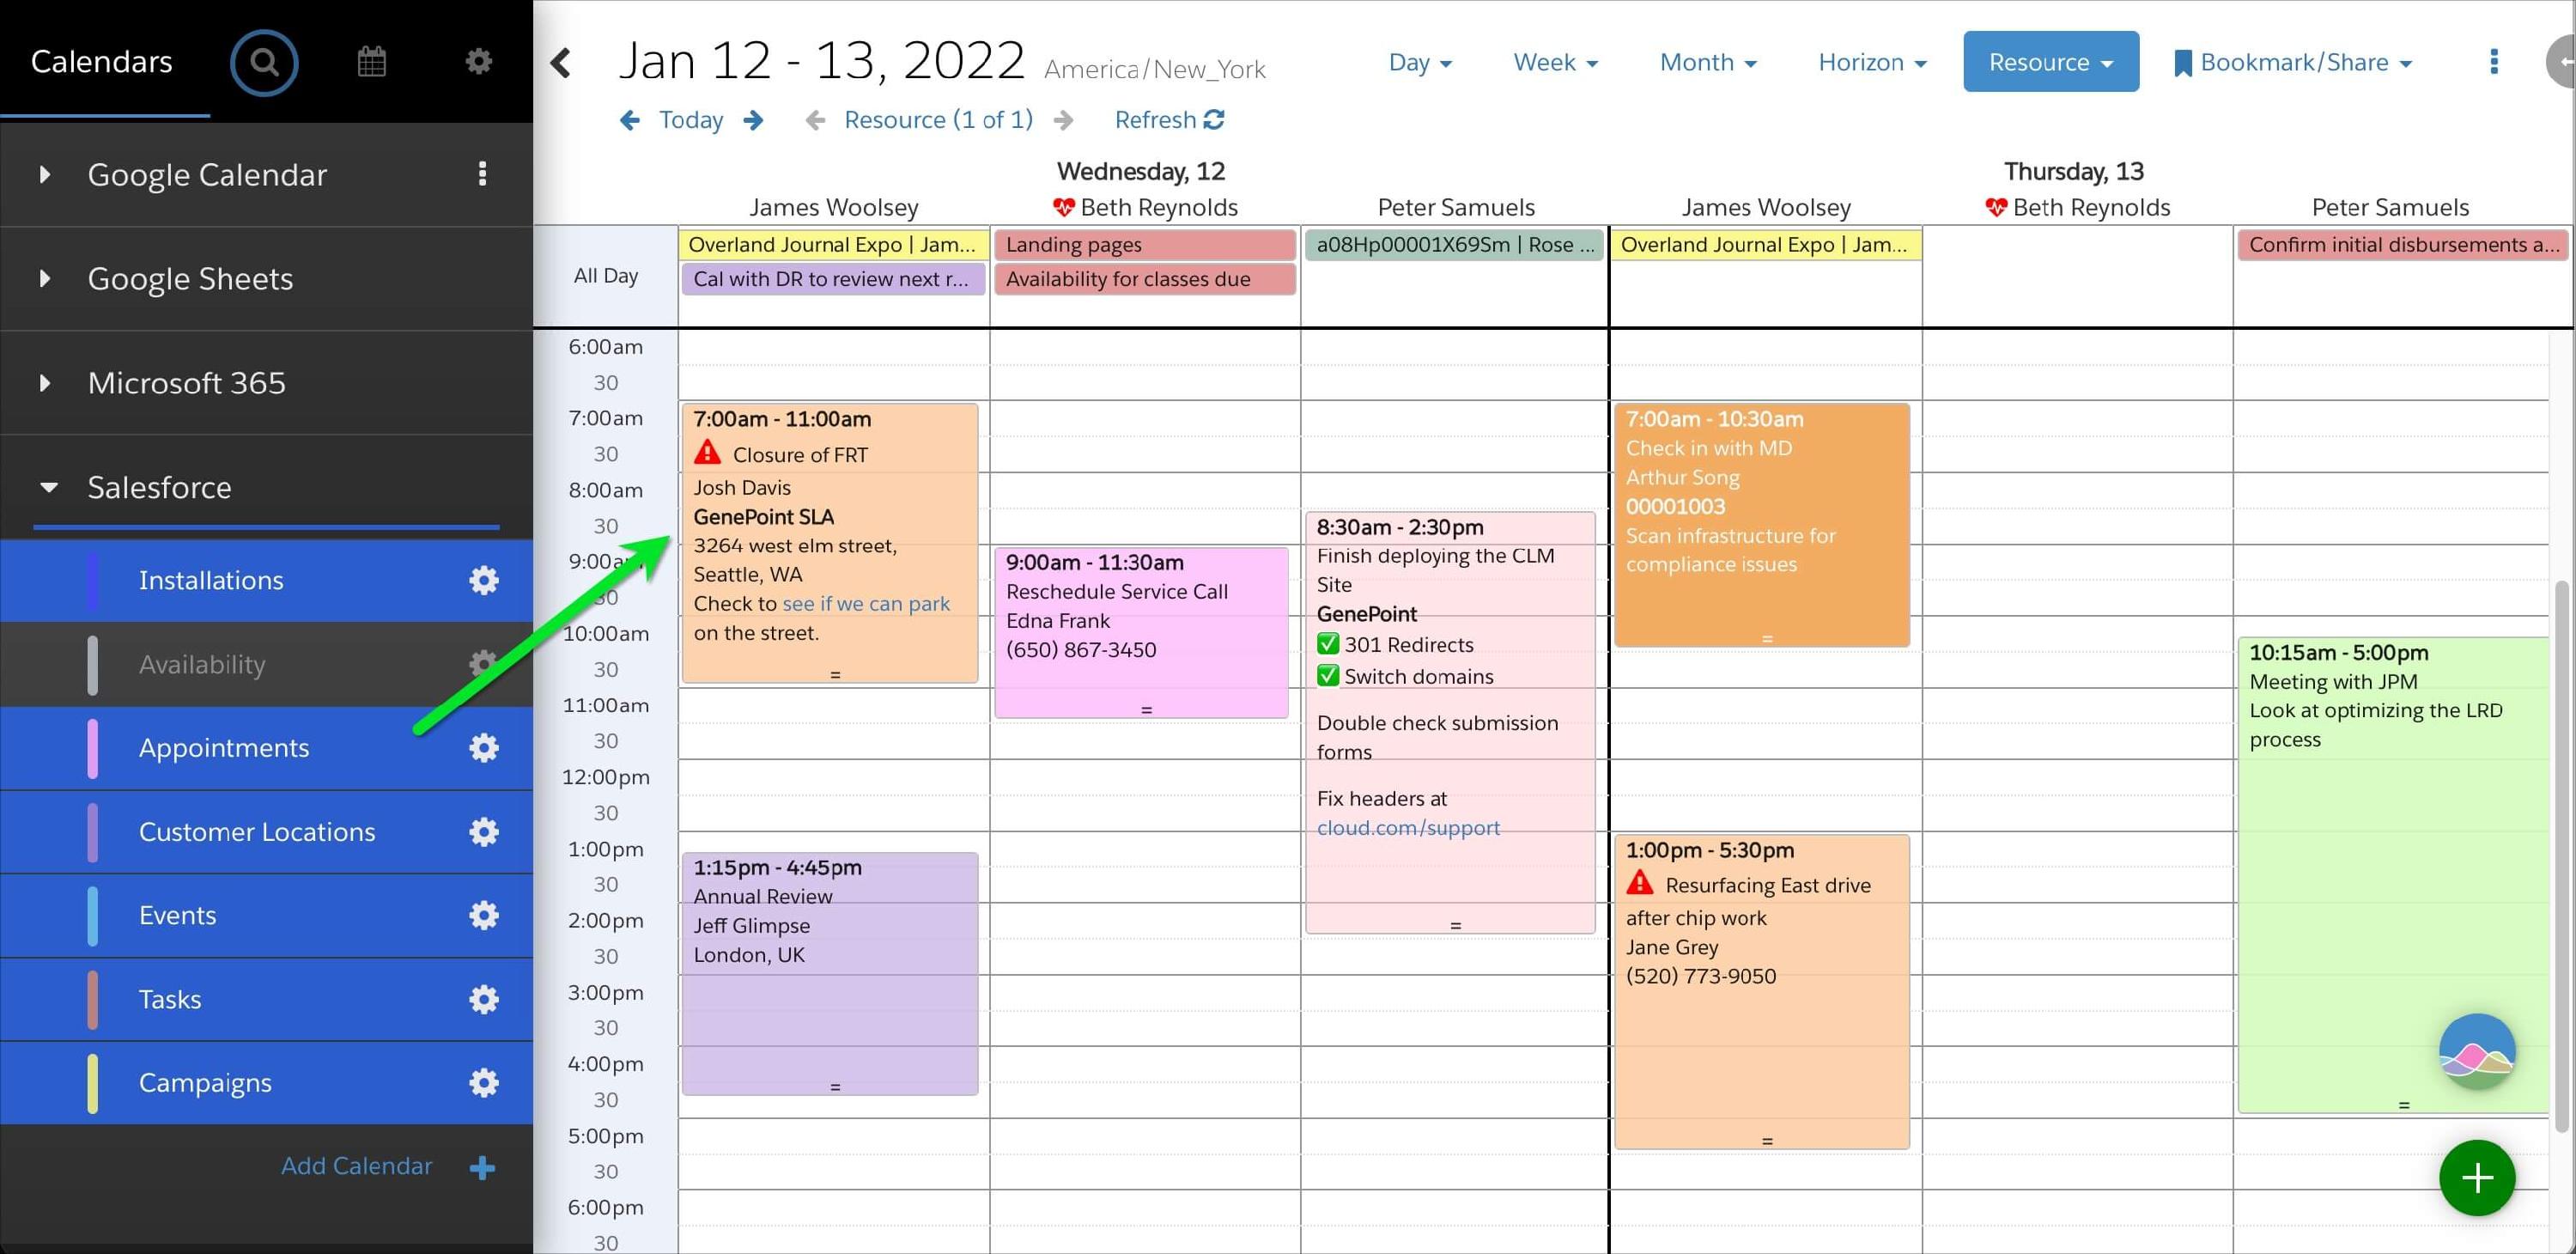
Examples
Listing Fields
The simplest approach is to list the fields you'd like displayed, separating them with commas. When referencing fields from DayBack's field mapping tab, you'll user the internal DayBack name for the field, like Title, Start, or Location.

These are the names that appear in bold on DayBack's field mapping tab in most sources. Here's a list:
- Title
- Description
- Start
- End
- Location
- Resource
- Status
In Salesforce and Salesforce Connect, you can use the field's name in your data source (the field's API name in Salesforce). Using the field's name in your data source, you can reference fields you have not mapped in custom fields: fields mentioned in the display are included in DayBack's Salesforce query even if they are not mapped.

For custom fields, use the field's "ID for Calendar Actions," the long identifier each custom field is assigned.


Field Separators
On schedule views, the values of your fields will be separated by carriage returns. On other views, DayBack will separate them using the character you specify in Admin Settings / Event Styles / Return Character Substitution. The default is a pipe character with spaces on either side.
To use styled text or icons for your separator, enter this in admin Settings / Event Styles / Return Character Substitution:
<dbk-css class="pipe_separator"></dbk-css>
Then, add something like this to DayBack's CSS:
.pipe_separator::before {
    content: "•";
    color: gray;
    font-size: 14px;
    padding-left: 9px;
    padding-right: 7px;
}
This example adds a little grey dot between your fields on DayBack's non-schedule views:

You can get even more control over customizing this using JavaScript following the instructions here: Adding Line Feed Characters.
Styling the Display with CSS
Going further, you can use tags to add inline styles, CSS, and icons to your events' display. This is described in detail here with lots of examples: Event Styles & Icons.

Changing the Display on Specific Calendar Views
If you'd like to show different fields on different views (or use different styling on different views), DayBack's CSS will let you target specific views.
(If you haven't played with DayBack's CSS much, you'll find a good introduction here. )
To accomplish this, you'll include the view name in your CSS like this: if you want to hide the description field on month view (since it can take up a lot of space), you'd wrap it in a class like this.

And then use that class after the view name to hide the field. (You can find the CSS classes for each view name here.)

You can also change the appearance of events when they appear in the unscheduled list by using this class in place of a view name:
.unscheduled-list {
}
Using a Formula, Calculation, or Computed Field
If your display formatting gets really complicated or you'd like to include If{...} statements in it, you may want to create a calculated field in your data source and then name that field in your display field. You can also use Custom Actions (JavaScript) to modify the display on the fly: Programmatic Event Styling with Before Event Rendered Actions.